As featured in Upstream Pumping® Magazine – January/February 2015 Issue

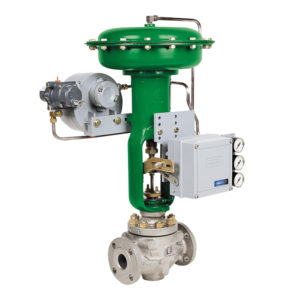
 In a conscious effort to cut costs, plant and oilfield operators are exploring and, ultimately, relying more on remanufactured equipment. Purchasing remanufactured equipment is a growing trend with clear advantages. Other than the obvious cost benefits that remanufactured equipment offers, end users are also making the environmentally conscious choice by recycling surplus equipment. Control valves can be remanufactured with a remarkable amount of skill, precision and quality.
Because of the increasing popularity of remanufactured automatic control valves, manufacturers and users are prioritizing reliability. End users need to know that the control valves they purchase will perform their expected tasks with the utmost accuracy, efficiency and reliability. The control valve assembly must meet the application’s requirements. To ensure that proper specification has occurred and that the valve delivered will meet the requirements, a series of tests are performed on each automatic control valve.
Standard Tests
A minimum of two standard tests must be performed on every control valve. The first test is called the Hydrostatic Testing of Control Valves(American National Standards Institute (ANSI)/International Standards for Automation (ISA)-75.19.01-2013), also called a hydro test. The second is the seat leakage test. These are the bare minimum tests for any automatic control valve, whether that valve is purchased from an original equipment manufacturer (OEM) or from a reputable remanufacturer. These tests confirm the safety and operational functionality of the control valve.
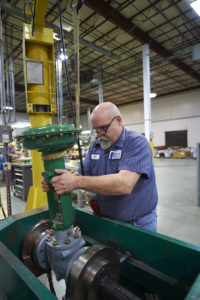
The hydrostatic pressure test is performed with high pressure water to validate the mechanical integrity of the valve body assembly, ensuring that the pressure containment of the valve is free of holes, leaks or cracks. In this test, the valve body is filled with water, and all the air in the valve is vented. The valve then needs to be pressurized to a prescribed level based on the valve’s nominal size and ANSI pressure class. If any visual weeping or leaking through the walls of the body or bonnet is detected or if it fails to hold the set pressure for a minimum of two minutes, the valve fails the hydrostatic test. This test is critical to the safety performance of the valve.
The seat leakage test, as detailed in Control Valve Seat Leakage Classification and Testing(ANSI/Fluid Controls Institute (FCI) 70-2-2006), is performed to ensure that the valve closure section—known as the plug and seat in a sliding-stem globe valve and the ball and seal in a v-notch ball valve—closes off to a specific tightness level. The medium used in this test is usually compressed air at 50 psi. In this test, the amount of pressurized air leaking past the plug and seat is measured and compared to the standards. If the control valve does not meet the maximum allowable leakage rates, it fails the seat leakage test.
If a control valve fails either test, it must be disassembled, inspected, corrected and reassembled. Both tests are then conducted again until the valve passes.
Different control valve types provide different tightness levels or shutoff classifications. The type of material used in the valve trim can determine the shutoff class. Each shutoff class has a maximum allowable seat leakage. Shutoff classes are numbered (II, III, IV, V and VI), as found in the standard.
Class II shutoff allows for a 0.5 percent leakage of the valve’s full open flow capacity. Class III allows for a 0.1 percent leakage of full open flow. The Class IV shutoff allows for a 0.01 percent leakage rate. Class V shutoff is limited to 0.0005 milliliters (ml) per minute per inch of orifice diameter per psi differential.
Class VI allows for a leakage limit that depends on the valve size ranging from 0.15 to 6.75 ml per minute for valve sizes between 1 and 8 inches. Classes II, III and IV are typically specified for metal seated valves, while Class V and VI are usually the specifications for soft-seated valves with resilient elastomers or spring-load metal seats used in the valve trim.
Additional Tests
The first two tests are conducted for every control valve in the industry, whether made by an OEM or remanufactured. Some additional tests are highly recommended and can further ensure the quality of a remanufactured control valve. These tests may be exclusive to the remanufactured control valve industry and include positive materials identification (PMI), control valve diagnostics, ultrasonic thickness testing and actuator spring testing.
Through a PMI test, the alloy composition of materials can be accurately determined. The test uses X-ray fluorescence for common metal and alloy analysis of control valve components so that the elemental composition can be identified. Discerning the control valve components’ materials of construction through visual inspection is difficult, making this test critical when analyzing them. While this information is generally found on the control valve’s data plate, these plates are often illegible, painted over or missing altogether on remanufactured valves.
Control valve trim materials are frequently labeled as “SST” by OEMs, referring to stainless steel. However, this does not tell end users everything they need to know. Is that 316SST, 416SST or 17-4PH SST? The abbreviation SST can refer to any number of stainless steel alloys. Metal compatibility needs to be understood in any case. This means both compatibility with other metals and with the process fluids that flow through these valves. Thousands of different materials can constitute the internal control valve components, so identifying the materials is a challenge for remanufacturers. Remanufacturers must be completely confident that the correct material is selected for the process and be sure that the valve body, trim and packing components are made from this specific material, which is compatible with the process fluids.

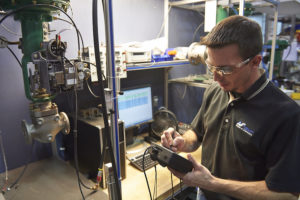
OEMs and some remanufacturers use a series of tests that measure different parameters including valve travel, response time, resolution and friction. These parameters can reveal the hysteresis, dead band and lag of the control valve, actuator and valve positioner. The test identifies a range of elements that can be used to determine the valve’s performance level and how well the valve will respond in a process control loop. Another analysis includes ultrasonic thickness testing, which can help determine proper valve body wall thickness. Additionally, a spring tester is used to confirm or validate the spring rate of worn or unidentified actuator springs.
Test Proven
Proper quality testing is a critical step in the remanufactured control valve industry. If testing is incomplete or carried out improperly, systematic failures may occur. End users who rely on the equipment must be assured that what they receive will do the job. Proper, documented testing is the best way to ensure adequate performance. For these reasons, making sure that all remanufactured equipment is up to the required standards is critical.
Browse our Ultimate Cheat Sheet on Fisher® Control Valves to learn more about remanufactured control valves.

