How to Mount a Fisher DVC6000 on Sliding Stem Valve
Today I’m going to show you how to mount a remanufactured Fisher DVC6000 series positioner on an actuator.
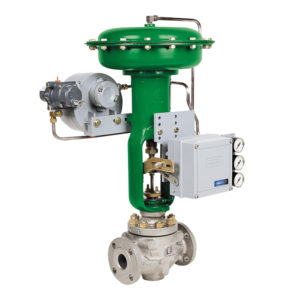
In this case, we’ll be using a remanufactured Fisher 667 size 30.
- First thing you want to do is get your mounting hardware in position to start the mount. The main components are the adjustment arm, the connector arm, lock nut and star washer. I like to set that hand tight, just to get it in a good starting position.
- You start by having one of your bolts to mount up to it halfway screwed into the yoke, so you can hang the bracket to get you lined up. As you slide it over, you want this connector arm to stay on top of the bias spring. As you line it up, we will thread the other bolt into the yoke and tighten both of them down.
- Next thing to do is get your travel adjusted. To do this, you need to retrieve the alignment pin from inside the cover. So, you loosen the four captivated screws to remove the cover.
- And here you’ll find this alignment pin that will hold this feedback arm in position as we adjust for it’s travel. We’ll loosen this up just a bit.
- This particular actuator has a three quarter inch travel, so I will adjust this feedback arm to line up with this connector arm shaft at that .75 mark, while aligning hole A with this alignment pin to the threaded hole in the housing.
- Once you have that secure, you can tighten that nut as you maintain its position. Alignment pin can go back into the retaining hole here in the module base and then we can connect our output to our actuator to the DVC.
- After that, you can apply supply pressure and move on to auto calibration.